
Setting Up a Great Vinyl Listening Space at Home
Setting Up a Great Vinyl Listening Space at Home
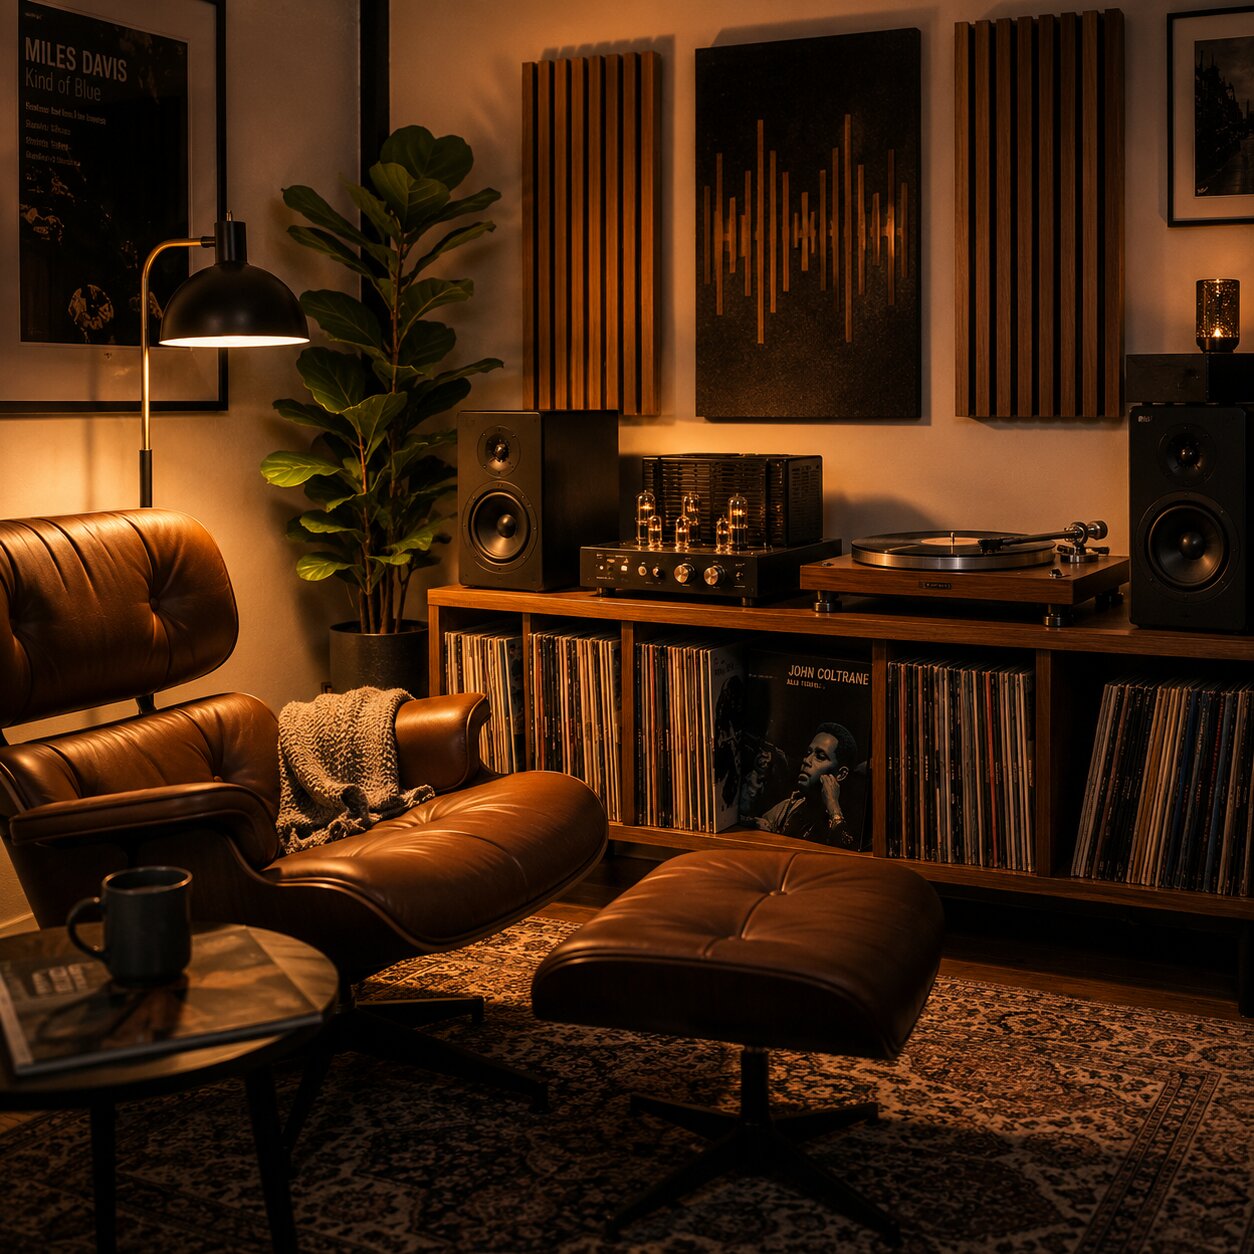
Getting the room right made a bigger difference to my listening than most gear upgrades. Speaker placement, isolation from the turntable, and just having a space that’s comfortable to sit in — all of it matters. This guide covers how I set up my listening corner and what actually improved the experience versus what was just aesthetics.
Setting up a home vinyl listening space requires positioning turntables on rigid, isolated surfaces away from speaker vibration paths, establishing an equilateral triangle speaker layout, managing room acoustics, and organizing vinyl storage within easy reach. Strategic equipment placement prevents acoustic feedback loops and optimizes stereo soundstaging.
Where and how you place your equipment matters almost as much as the gear itself. Even an expensive audiophile turntable will perform poorly if placed directly on the same cabinet as a pounding subwoofer or jammed into an acoustic corner. Creating an intentional, resonance-free listening space transforms casual playback into an immersive musical experience. Here is how to position your turntable, arrange speakers, and optimize room acoustics.
Turntable Placement and Avoiding Feedback
Isolating your turntable from acoustic speaker vibrations and mechanical footfalls is the single most critical placement rule.
- Never place speakers on the same surface as the turntable: Speaker cabinets vibrate when reproducing sound. If a turntable sits on the same furniture piece, speaker vibrations travel directly through the plinth into the stylus, creating low-frequency acoustic feedback (a loud, howling bass rumble) and blurring audio detail.
- Position turntables away from speaker bass ports: Avoid placing your turntable directly in front of or beside speaker woofer drivers or rear bass reflex ports. Low-frequency soundwaves excite the tonearm assembly, causing mistracking and muddy low-end performance.
- Isolate against floorboard footfalls: If your listening space features springy wooden floorboards that cause the needle to skip when you walk past, mount your turntable on a heavy wall-mounted shelf anchored directly into load-bearing wall studs.
- Decouple the plinth from furniture: Use specialized isolation platforms or sorbothane feet to absorb ambient room vibrations and motor hum.
I recommend the Auralex ISO-Tone Turntable Isolation Platform ($79, combines a dense ISO-Deck foam base with a rigid 12×18-inch laminate top plate, eliminating acoustic speaker feedback and floorboard rumble, though increasing total turntable height by 2 inches). For desktop setups, decouple speakers using Auralex Acoustics MoPAD Isolation Pads ($45 per pair, high-density foam pads that prevent speaker vibration from bleeding into furniture).
For comprehensive tonearm alignment and leveling guides, read our turntable setup and calibration guide.
Basic Room Considerations for Casual Listening
Arranging your speakers and seating in an equilateral triangle optimizes stereo imaging and vocal soundstaging.
To optimize your room acoustics without turning your living space into a sterile recording studio:
1. Establish the Equilateral Triangle: Position your left and right stereo speakers equidistant from each other and from your primary listening seat (e.g., 6 feet between speakers, 6 feet from each speaker to your chair). Angle (toe-in) the speakers slightly inward toward your ears.
2. Ear-Level Tweeter Height: Position speakers so that high-frequency tweeters sit at the same vertical height as your ears when seated in your listening chair (typically 36 to 40 inches from the floor). Use dedicated speaker stands if necessary.
3. Manage Hard Surface Reflections: Hard hardwood floors, bare glass windows, and smooth drywall reflect soundwaves, creating harsh treble slap-echoes. Place a plush area rug on the floor between your speakers and chair, and hang soft curtains over windows to absorb high-frequency reflections.
4. Pull Speakers Away from Back Walls: Placing speakers flat against back walls or tight in room corners exaggerates boomy, muddy bass frequencies. Pull speakers at least 12 to 18 inches away from rear walls to tighten acoustic bass response.
5. Keep Records Within Arm’s Reach: Position your vertical record storage shelving adjacent to your listening seat and turntable setup, allowing you to browse sleeves and flip record sides effortlessly without disturbing your listening session.
6. Provide Adequate Equipment Ventilation: Ensure your integrated amplifier or receiver has at least 3 inches of clear airspace above its top chassis vents to dissipate heat during extended playback sessions.
For heavy-duty storage shelving recommendations and archival inner sleeve guides, consult our record cleaning and storage guide. To wire your turntable, preamp, and receiver correctly across your listening space, read our vinyl signal chain guide.
Frequently Asked Questions

Chris Pitcher
Independent vinyl collector helping music lovers discover records worth owning through reviews, recommendations and buying guides.