
Turntable Setup & Calibration: Step-by-Step Guide

Turntable Setup & Calibration: Step-by-Step Guide
A good turntable badly set up sounds worse than a mediocre turntable dialled in properly — I’ve heard this first hand. Getting tracking force, anti-skate, and cartridge alignment right takes about an hour the first time, and once it clicks it becomes second nature. Walk through it with me here.
Setting up and calibrating a turntable requires leveling the plinth, mounting and aligning the cartridge, balancing the tonearm, setting vertical tracking force, adjusting vertical tracking angle and azimuth, and dialing in anti-skate. Proper calibration ensures maximum musical detail, accurate stereo separation, and minimal groove wear on your vinyl collection, while targeted upgrades like isolation feet, stylus replacements, platter mats, and external preamps elevate playback performance further.
I have found that a $300 turntable calibrated with precision will regularly outperform a $1,000 deck set up carelessly. Skipping basic alignment steps leads to tracking errors, harsh high-frequency distortion, and permanent vinyl wear. Here is how to assemble, calibrate, maintain, and upgrade your deck step by step.
Setting Up a Turntable From Scratch
Proper turntable assembly requires precise physical alignment across three axes to ensure the stylus sits squarely in the groove without causing uneven channel wear.
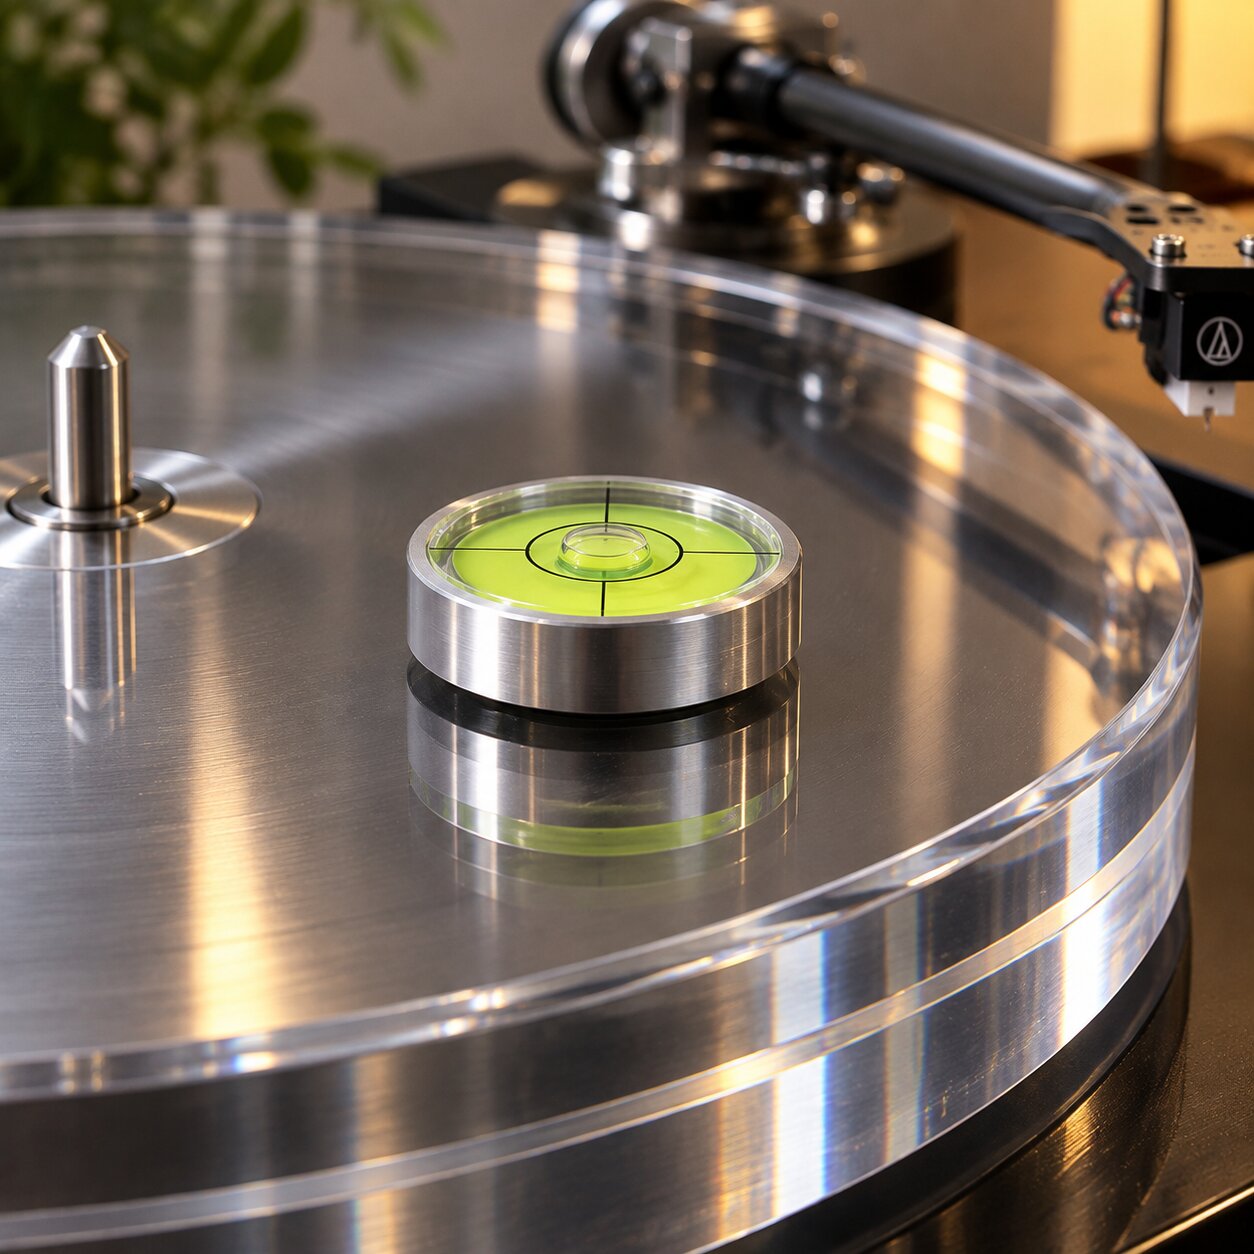
Leveling and Placement
1. Select a rigid, low-resonance surface: Place your turntable on a heavy furniture piece, dedicated audio rack, or wall shelf situated away from room corners and direct speaker vibration paths.
2. Measure surface level across two axes: Place a bubble level or spirit level flat across the platter surface, checking both front-to-back and left-to-right alignment.
3. Adjust turntable feet: Rotate adjustable threaded feet clockwise or counterclockwise until the bubble rests perfectly centered in both directions. If your turntable lacks adjustable feet, shim beneath the base feet using rigid cardstock or dense rubber pads.
An unlevel platter causes the tonearm to drift laterally due to gravitational pull. This uneven gravity pull forces the stylus to press harder against one groove wall than the other, distorting stereo balance and accelerating vinyl wear over time.
Mounting the Cartridge
1. Attach color-coded cartridge leads: Using fine needle-nose pliers, carefully slide the four color-coded tonearm lead clips onto the corresponding rear pins of the phono cartridge (Red \= Right Signal, Green \= Right Ground, White \= Left Signal, Blue \= Left Ground).
2. Mount body loosely to headshell: Secure the cartridge body to the headshell using non-magnetic brass or aluminum screws and washers, leaving them slightly loose to allow forward and backward sliding.
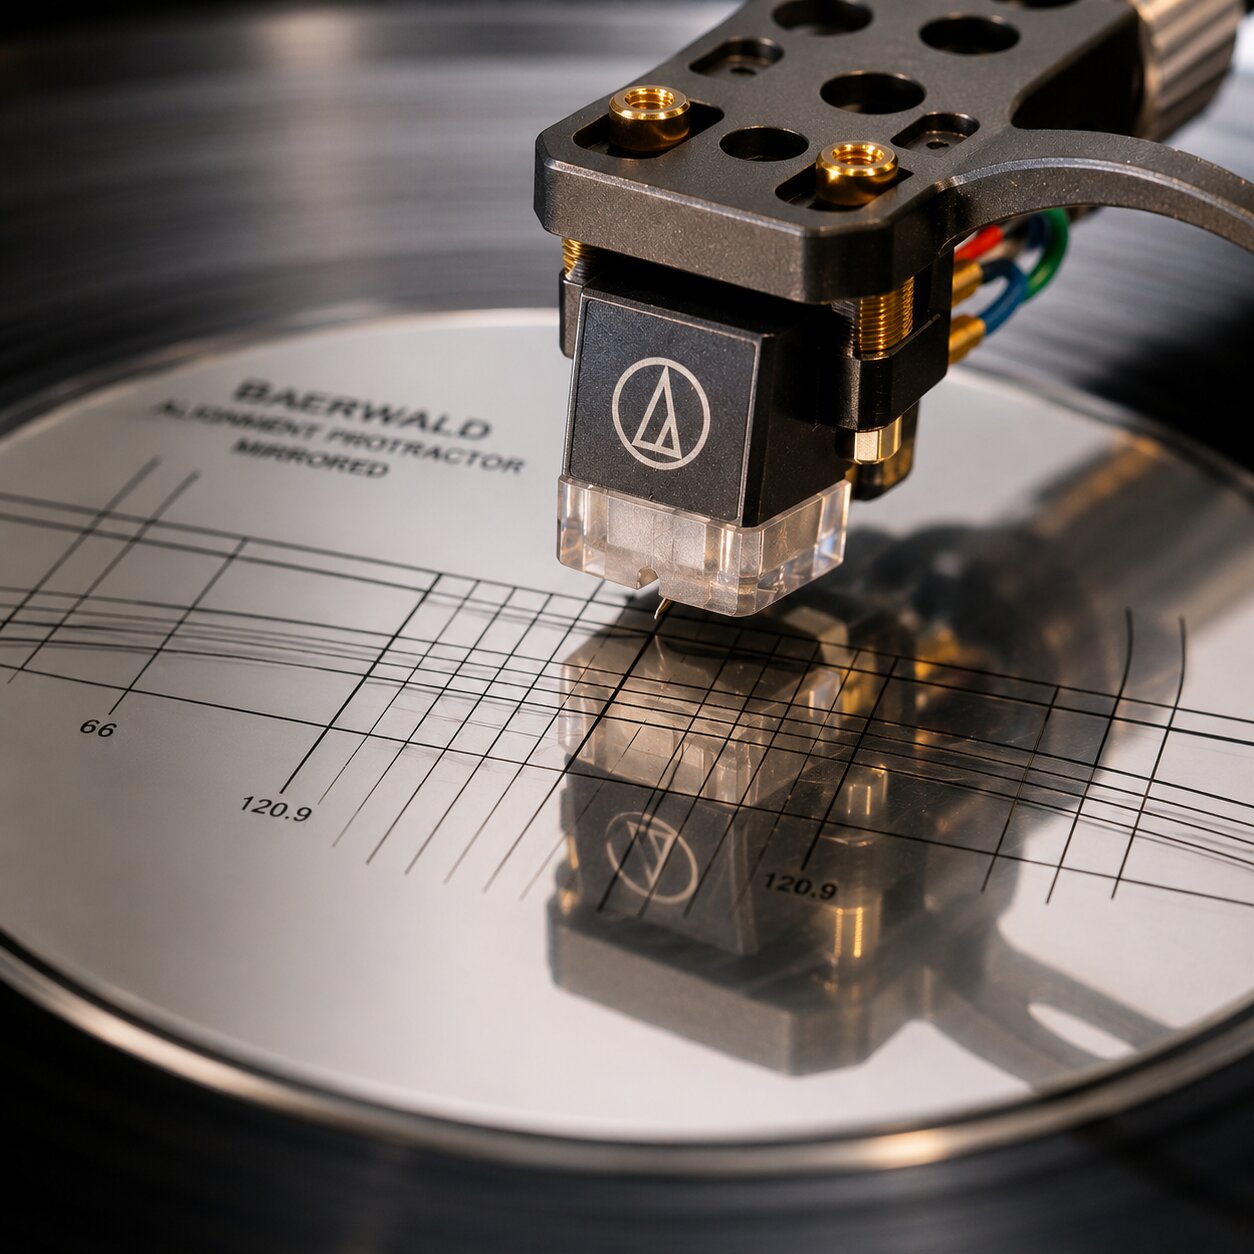
3. Set overhang using an alignment protractor (Vinyl Cartridge Alignment Protractor): Place a paper or mirrored alignment protractor over the center spindle. Carefully lower the stylus tip onto the inner and outer grid crosshairs, rotating the cartridge until the body lines up parallel with the grid lines at both points.
4. Select an alignment geometry: Use the Baerwald geometry for balanced low distortion across the entire side, Stevenson for reduced inner-groove distortion, or Löfgren for minimum total harmonic distortion across the middle tracks.
5. Set Vertical Tracking Angle (VTA): Adjust the height of the tonearm base so that the tonearm tube runs perfectly parallel to the record surface when the needle rests in the groove.
6. Set Azimuth: View the cartridge directly from the front to ensure the stylus sits 90 degrees perpendicular to the record surface. If tilted, loosen the headshell locking collar or adjustment screw to rotate the cartridge head straight.
7. Tighten mounting screws securely: Gently tighten the mounting screws while holding the cartridge body still, verifying that the alignment has not shifted during tightening.
Inaccurate cartridge alignment causes tracking angle errors. When the stylus sits crooked inside the groove, complex high-frequency passages sound harsh, sibilant, and compressed.
Balancing the Tonearm and Setting Tracking Force
1. Set anti-skate to zero: Turn the anti-skate dial or weight system to 0 to eliminate horizontal tonearm tension during balancing.
2. Float the tonearm horizontally: Disengage the tonearm lock and rotate the rear counterweight forward or backward until the tonearm floats completely level in mid-air, parallel to the platter surface.
3. Zero the tracking force scale: Without disturbing the main weight position, hold the heavy counterweight still and rotate the front numbered gauge ring so that “0” aligns with the center indicator line on the tonearm tube.
4. Apply vertical tracking force (VTF): Rotate the main counterweight counterclockwise (viewed from behind) until the manufacturer’s recommended weight (typically between 1.5g and 2.2g) matches the indicator mark.
5. Verify actual weight with a digital scale: Place a digital stylus force gauge directly on the platter surface and lower the needle onto the sensor pad to measure true downward force.
I recommend using a digital stylus force gauge — $17, provides precise 0.01g accuracy and backlit display, though requiring flat battery placement) rather than trusting counterweight markings alone. Incorrect tracking force damages grooves: tracking too light causes the stylus to bounce and chip groove walls, while tracking too heavy squashes the cantilever suspension and dulls transient response.
What Is Anti-Skate and Why It Matters
As a vinyl record spins beneath a tonearm, friction between the groove wall and the offset cartridge head pulls the tonearm inward toward the center spindle. Anti-skate applies an opposing outward mechanical force—via a spring mechanism, magnetic field, or hanging counterweight—to keep the stylus centered inside the groove channel.
- Under-skating (too little force): Friction pulls the stylus against the inner groove wall (left channel audio), causing right-channel sibilance, mistracking, and uneven left-side groove wear.
- Over-skating (too much force): Excessive outward pull forces the stylus against the outer groove wall (right channel audio), dampening left-channel response and straining the cantilever suspension.
- Proper anti-skate calibration: Stylus applies equal contact pressure against both groove walls simultaneously, maximizing stereo channel separation and extending needle life.
Different turntable manufacturers utilize varying mechanical designs to apply anti-skating force across the tonearm assembly:
- Spring-loaded anti-skate: Uses an internal calibrated spring tensioned by a top-mounted dial; common on modern Japanese direct-drive turntables.
- Hanging weight on thread: Uses a small lead or brass weight suspended from a thread looped over a notched rod; common on European audiophile belt-drive decks.
- Magnetic anti-skate: Uses opposing rare-earth magnets to apply non-contact repulsive force; eliminates mechanical wear over time.
As a general starting rule, set your anti-skate control to match your measured vertical tracking force. If your tracking force is set to 1.8 grams, set the anti-skate dial to 1.8. You can fine-tune anti-skate by playing a blank ungrooved test disc or listening for equal sibilance thresholds in both channels during loud vocal peaks.
Checking and Fixing Speed Accuracy
Turntable motors and drive belts drift over time, causing subtle pitch shifts and timing inconsistencies known as wow and flutter.
Using a Strobe Disc or App
To verify rotational speed accuracy (33⅓ or 45 RPM), use a physical strobe disc illuminated under a 60Hz ambient light source, or a mobile phone speed testing app placed flat over the platter spindle.
1. Position the strobe disc: Place the strobe disc flat over the center spindle and power on the motor to reach full operating speed.
2. Observe printed strobe patterns: Illuminate the disc under standard AC indoor lighting or a dedicated LED strobe light source.
3. Interpret visual movement: Under correct speed, the printed tick mark ring for your selected speed appears visually frozen. If the bars drift clockwise, the platter is running fast; if they drift counterclockwise, the motor is running slow.
I use the Hudson Hi-Fi Turntable Strobe Disc (Hudson Hi-Fi Turntable Strobe Disc) and Alignment Protractor → ($13, combines speed verification and cartridge alignment on a durable plastic disc, though requiring a 60Hz room light to function properly).
If a belt-drive turntable runs slow or wavers, clean the motor pulley and subplatter rim with 99% isopropyl alcohol to remove oil residue. If pitch instability continues, replace the rubber drive belt, as stretched belts slip against the drive pulley. On direct-drive turntables with speed drift, clean the internal pitch calibration potentiometers using electrical contact cleaner.
Isolation and Vibration Control
Acoustic feedback from room speakers and low-frequency vibrations from footfalls travel through furniture directly into the stylus, obscuring fine detail and introducing muddy bass resonance.
Isolation Feet, Platforms and Wall Shelves
Controlling acoustic feedback requires mechanically decoupling the turntable plinth from the supporting room structure:
| Isolation Equipment | Target Vibration Source | Primary Performance Advantage | Trade-Off / Consideration |
|---|---|---|---|
| Silicone Isolation Feet | Desktop and bookshelf resonance. | Inexpensive, absorbs motor hum and light surface vibration. | Offers limited dampening against heavy floorboard footfalls. |
| Sorbothane Hemispheres | Mid-tier belt and direct-drive decks. | Excellent energy absorption across low-frequency spectrum. | Can leave oily residue on wood surfaces without protective discs. |
| Mass-Loaded Platforms | High-end turntables on hollow furniture. | High mass dissipates acoustic feedback from room speakers. | Significantly increases equipment footprint and total weight. |
| Wall-Mounted Shelves | Rooms with springy, flexible wooden floorboards. | Eliminates footfall vibrations completely by mounting to studs. | Requires permanent mounting hardware into load-bearing wall studs. |
For desktop and furniture setups, I use Hudson Hi-Fi Silicone Isolation Feet (Hudson Hi-Fi Silicone Isolation Feet) → ($15 for a set of 4, effective at damping motor hum and rack vibrations, though limited against heavy footstep thumps). If your turntable sits in a room with flexible wooden floorboards that cause skipping when you walk past, installing a wall-mounted shelf anchored to studs is the single most effective solution available.
When to Upgrade Your Turntable
Knowing when to upgrade individual components versus replacing the entire turntable prevents wasting money on mismatched audio gear.
Signs You’ve Outgrown Your Current Deck
You should consider replacing your entry-level turntable hardware when you experience any of the following limitations:
- Non-adjustable tonearm hardware: Your deck uses a proprietary cartridge or fixed plastic tonearm with no counterweight or anti-skate adjustments.
- Inherent motor hum and rumble: Mechanical motor noise bleeds continuously into your speakers despite proper grounding connections.
- Platter speed instability: Light stamped-steel platters cause persistent pitch fluctuations that cannot be corrected with a belt replacement.
- Upgraded signal chain bottlenecks: You have upgraded your speakers and phono preamp, but audio detail remains flat and compressed due to tonearm resonances.
When planning component upgrades for a capable turntable, follow this cost-effective upgrade hierarchy to maximize sound quality improvements per dollar spent:
1. Phono Cartridge / Stylus Upgrade: Replacing a basic conical stylus with an advanced elliptical or microline cartridge yields the most immediate improvement in detail retrieval and tracking ability.
2. External Phono Preamp: Bypassing an entry-level built-in preamp with a dedicated external unit expands dynamic range and lowers background noise.
3. Platter Mat Material: Replacing thin felt mats with cork, rubber, or leather dampens static charges and tightens bass response.
4. Vibration Isolation: Adding sorbothane pods or an isolation platform cleans up acoustic resonance from speakers.
Before replacing your entire turntable, consider upgrading your phono cartridge first. For a complete guide on selecting your first deck or evaluating budget tiers, read our first turntable guide.
Vintage vs. Modern Turntables
Choosing between vintage and modern decks involves trading immediate plug-and-play reliability against potential high-value engineering.
Restoration Considerations for Vintage Decks
| Performance Metric | Modern Turntables | Vintage Turntables (1970s–1980s) |
|---|---|---|
| Out-of-Box Condition | Ready to play immediately with full factory warranties. | Requires mechanical inspection, cleaning, or restoration. |
| Build Materials | Dense composite wood, MDF, acrylic platters. | Heavy cast alloy plinths, machined aluminum platters. |
| Drive Mechanisms | Simple belt-drive motors dominate consumer tiers. | Direct-drive quartz-locked motors widely available. |
| Preamp Integration | Often includes built-in switchable phono preamps. | Requires an external phono preamp or vintage receiver. |
When restoring vintage turntables (such as classic Technics, Pioneer, Thorens, or Dual models), perform these essential maintenance tasks before playing valuable records:
- Clean and re-lubricate spindle bearings: Remove old hardened grease from the platter spindle shaft and re-apply fresh synthetic machine oil.
- De-oxify electrical contacts: Spray DeoxIT D5 contact cleaner into internal pitch controls, power switches, and RCA output jacks to eliminate scratchy signal dropouts.
- Refill cueing mechanism fluid: Replace leaked silicone fluid (typically 300,000 to 500,000 cSt viscosity) inside the tonearm cueing cylinder to restore slow, smooth arm lowering.
- Inspect tonearm bearings: Gently test the tonearm tube for unwanted play or binding; worn gimbal bearings cause mistracking and channel imbalance.
To integrate your calibrated deck into a complete receiver and speaker setup, consult our vinyl signal chain guide.
Frequently Asked Questions

Chris Pitcher
Independent vinyl collector helping music lovers discover records worth owning through reviews, recommendations and buying guides.